
How To Install Self-Adhesive Wall Murals
The following instructions detail how to install your new self-adhesive wallpaper mural quickly and easily.
Follow these simple steps to hang your wall mural perfectly. You will need the following:
- Spirit level
- Pencil
- Ruler
- Felt applicator (or credit card and cloth!)
- Sharp utility or craft knife
Step 1
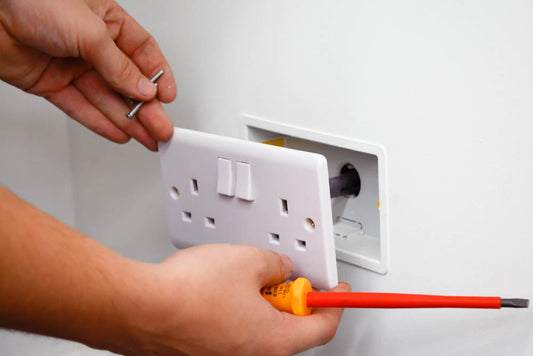
Unscrew any sockets or light switches which will be in the way during install - remember to turn the power off at the fuse box first!
Step 2
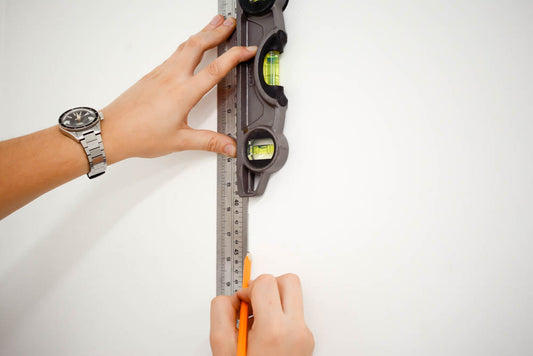
Measure 45cm (48cm paper width less the 3cm added for trimming) from the left-hand edge of your wall. Use a spirit level to make sure your ruler or measuring tape is perfectly horizontal when doing so.
Draw a vertical line along the full height of your wall at the point we just measured. Again, use a spirit level to ensure the line is perfectly vertical.
Tip: Take your time over this step - the straighter the first drop, the easier the install!
Step 3
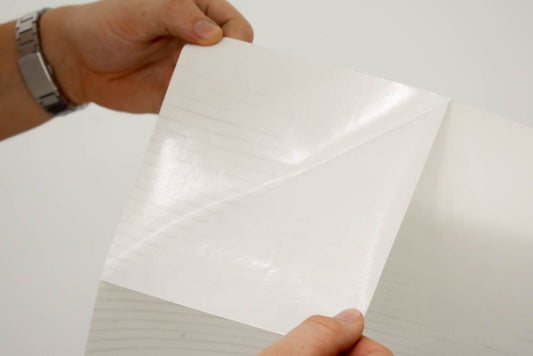
Peel around the top ~25cm of the protective backing off the self-adhesive wallpaper. Carefully align the right-hand edge of the first drop to the pencil line we drew in Step 2, leaving around ~3cm extra at the top for trimming. Press to stick down, and once happy with the position slide your hand over the rest of the exposed adhesive to ensure full adhesion.
Slowly pull the backing paper off whilst ensuring the right-hand side of the paper lines up to your vertical pencil line all the way down.
If you have any plug sockets or switches, cut a small hole where the socket will be on the paper and feed the plug through the hole.
Tip: If the position is not perfect, simply peel the paper off the wall and stick it down again until it is!
Step 4
Slowly pull the backing paper off whilst ensuring the right-hand side of the paper lines up to your vertical pencil line all the way down.
If you have any plug sockets or switches, cut a small hole where the socket will be on the paper and feed the plug through the hole.

Step 5
Line up the second drop with the left-hand edge against the right-hand edge of the first. Match the pattern by eye and apply straight down in the same way as the first.
Repeat as necessary for the remaining drops.
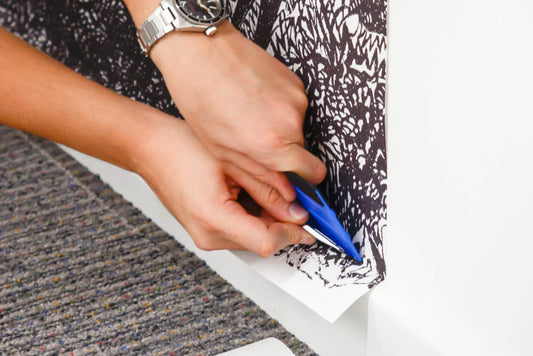
Step 6
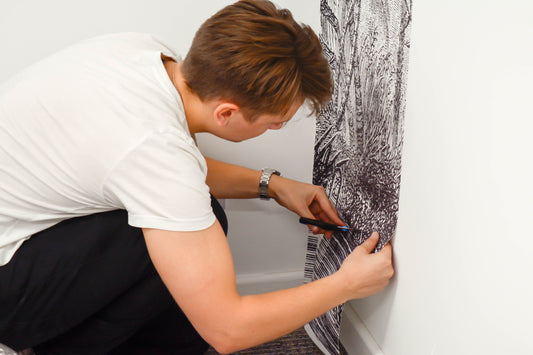
Using a sharp knife, trim away any excess paper to leave a clean straight edge. Running a knife along side a wallpaper spatula can help to keep the blade straight allowing for a better overall finish.